Installing CyberPanel
Requirements for Installation.
In order to install CyberPanel, you need to ensure that you meet the following requirements.
- Server with fresh installation of Ubuntu 18.04, Ubuntu 20.04, AlmaLinux 8, Ubuntu 22.04, CloudLinux 8.
- 1024MB RAM, or higher
- 10GB Disk Space
CyberPanel with CyberPanel Ent
CyberPanel is exactly the same in both versions. The only distinction lies in the choice of web server running in the back-end.
- CyberPanel normally comes with OpenLiteSpeed and it is completely free for an unlimited number of domains (You can host unlimited domains) and work processes.
- CyberPanel Enterprise comes with LiteSpeed Web Server Enterprise and it is free for one domain and if you want for multiple domains you can get different plans according to your needs on the Pricing page. The CyberPanel License includes the price of the Litespeed Enterprise license.
To learn more about Open Litespeed and Litespeed Enterprise please check this comprehensive comparison.
Let’s proceed with the installation.
Installing CyberPanel
The CyberPanel installation process is straightforward and can be completed by following the provided instructions.
- Step 1: Connect to the server via SSH client. (Putty, Bitvise SSH client, etc)
First login to your server through SSH client as a Root user (Sudo will not work). You can get the Login details from your web host. - Step 2: Update server Packages.
Update your server OS first (Because it updated overall services because it provides much better compatibility). Run this command
For Ubuntu:
sudo apt update && sudo apt upgrade -y
For CentOS/Alma/Rocky:
sudo yum check-update
sudo yum update
- Step 3: Run the Installation Script. Execute the provided command to initiate the automated installation script. This script will guide you through several decisions regarding the LiteSpeed version and additional add-ons you wish to install.
sh <(curl https://cyberpanel.net/install.sh || wget -O - https://cyberpanel.net/install.sh)
- For some reason, If you are not log in as root user, Then use this below Script.
sudo su - -c "sh <(curl https://cyberpanel.net/install.sh || wget -O - https://cyberpanel.net/install.sh)"
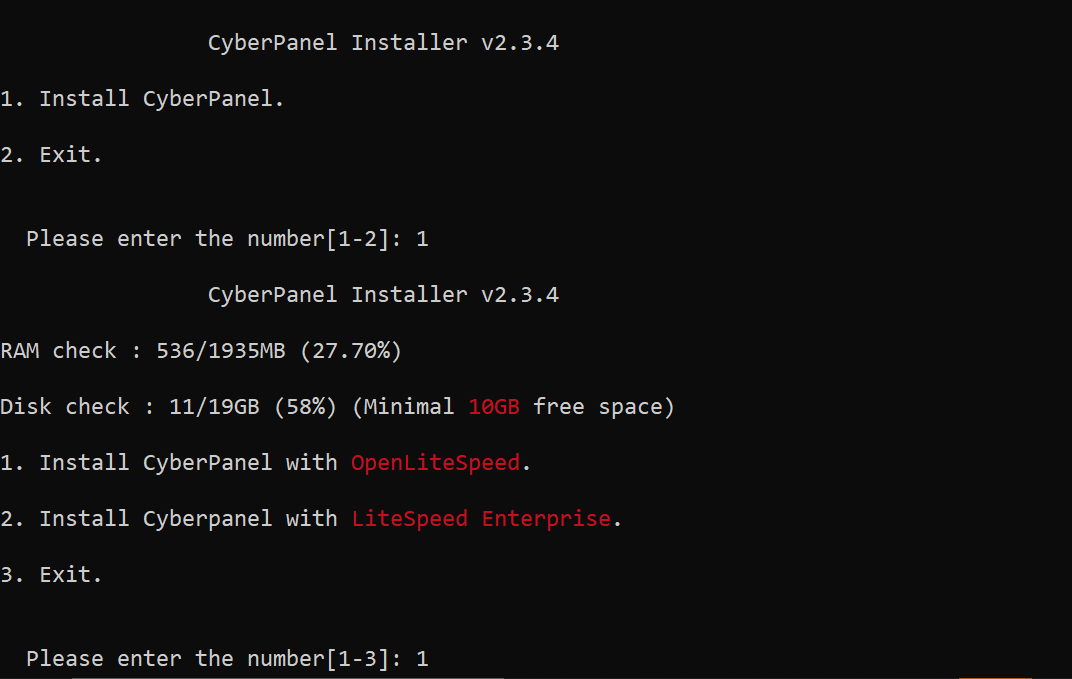
- Step 4: Select the version of LiteSpeed that you would like to use.
As mentioned above in the CyberPanel with CyberPanel Ent Select which version of Litespeed You want to Install. If you select Litespeed Enterprise, Please first ensure that you have got the license key. You can visit the Pricing page to get the required plan.
- If you select LiteSpeed Enterprise, you will see the following prompt. Enter your serial number
If you do not have any license, you can also use a trial license (if the server has not used a trial license before), type TRIAL
Please input your serial number for LiteSpeed WebServer Enterprise: - Step 5: Select Services and Packages.
You will encounter a sequence of prompts offering various options and add-ons for selection.
– Full Service (default Y):
PowerDNS – an open-source DNS server
Postfix – open-source mail transfer agent
Pure-FTPd – open-source FTP server
– Remote MySQL (default N):
Allow for your Database to be installed on a remote server
- – Remote MySQL (default N):
Allow for your Database to be installed on a remote server
– CyberPanel Version (default Latest Version):
You can choose to install a previous version of CyberPanel, or press Enter to install the latest version.
– Password (default “1234567”):
Using the default password is not advisable. It is recommended to set a strong password of your own by choosing ‘s’ or generate a random password by selecting ‘r’. After the installation, you will see the password prompt displayed on the screen.
– Memcached (default Y):
Distributed memory object caching system
– Redis (default Y):
In-memory data structure store, used as a database, cache, and message broke
– Watchdog (default Yes):
A kernel watchdog is used to monitor if a system is running. It is supposed to automatically reboot hanged systems due to unrecoverable software errors - Step 6: Installation Processing
The installation process will initiate automatically and is expected to be complete within 5-10 minutes, depending on your server’s speed. - Step 7: Finalize Installation
Upon completion of the installation process, you will encounter a screen displaying important information regarding your configuration. It is recommended to select and securely copy this information to a safe location for future reference.